
How to Put a Flute Together
One of the first things that every flutist has to know is how to put the flute together. This is a fairly simple process, but there are a few nuances and pitfalls that are good to know about. In short:
To put the flute together properly, first open the case on a flat stable surface and make sure that the keys are facing upward. Then use a gentle twisting motion to attach the head joint to the barrel and the foot joint to the bottom end of the flute. Avoid gripping the flute by any of the keys or rods.
This is intended to be a step-by-step guide that you can easily follow along through this process. After reading this guide, you may want to see our guide on how to hold the flute, which is the next step after learning how to put it together.
Step 1: opening the case
Always make sure that your flute case is on a sturdy and flat surface before opening it. Putting it on the floor or on a table is a good idea. I recommend that you do not put it on your lap, or on a chair with wheels. It is easy for the flute case to slide off of unstable surfaces, which often leads to damage.
You’ll need to make sure that you open the case in the right direction. The keys should always be facing up when you open the case. In general, having the case upside-down is a bad idea because it puts pressure on the keys and rods. Also, opening your flute case upside-down will cause the flute to immediately fall out.
There are two main types of flute cases, and you’ll need to know how to correctly open the one that you have. An easier way to tell is to look for the logo on the case – the logo should nearly always be facing up.
Type 1: latches on bottom
On many flute cases, there are latches which typically are intended to open upward. You can use these to determine which side of the case should be facing upward as you open it.
So, you should aim to have the latches on the bottom when you open up the case. That is, you should make sure that you are opening them upward. You can see what this looks like in the image below:

Type 2: latches which pull to the side
Some cases have knobs which do not open up or down, but rather are intended to be pulled to the side. It is less obvious which part of the flute case should be facing up for these, but you can still tell because one side of the flute case is typically flat while the other side is rounded. The flat part of the flute case should be facing down, while the rounded part should be facing up.

Inside the case, you’ll find three main parts: the head joint, the body of the flute, and the foot joint. You can see each of these parts labelled in the case below:

Before starting to put it together, you may want to wipe the joints with a microfiber cloth – this is just to get the oils off and make sure that it is clean beforehand.
Step 2: attaching the head joint to the body
Start by removing the head joint and the body from the case. You have to be careful about the way that you hold the body, as the keys and rods can be easily damaged. If you look at both ends of the flute, you’ll see that one end has lots of keys by it, while the other end has fewer keys. You should aim to hold the body by the section that has fewer keys or rods, which is also close to the area where you’ll attach the head joint. Use a gentle but firm grip – the rods and keys are easily crushed.
You can hold the body by the barrel (section with no keys), but some flutists opt not to as this part doesn’t offer much leverage and it can be easy to drop the flute. It is okay to have your hand overlap with a few keys near the barrel, provided that you aren’t putting pressure on the keys or rods. You can see below where to hold the body of the flute (and where not to).

The head joint doesn’t have any keys on it, but there is still a specific way in which you should hold it. You don’t want to hold it by the lip plate (mouthpiece) as this part can easily be bent and destroyed. You also don’t want to hold it by the top (near the cap, called the crown) because you don’t want to accidentally pull the crown out. This part doesn’t offer much leverage anyway.
Rather, you want to hold it by the bottom part, close to where the hole is. You can see below where to hold the head joint.

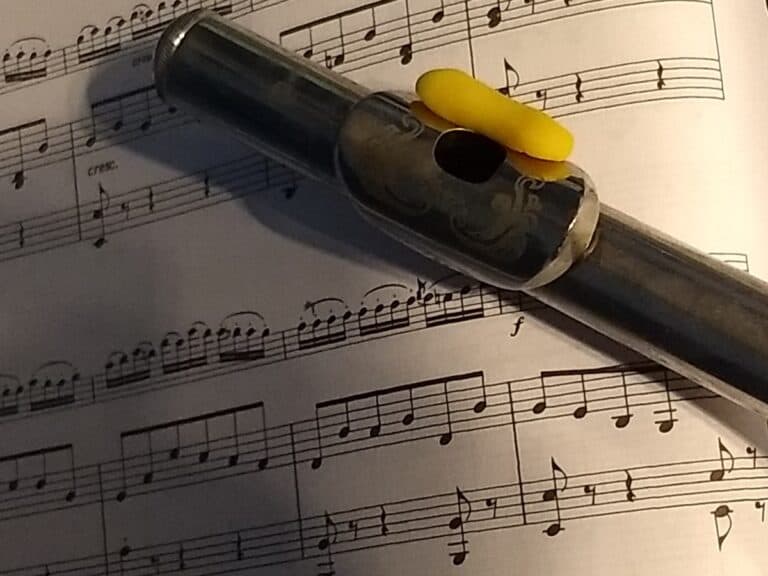
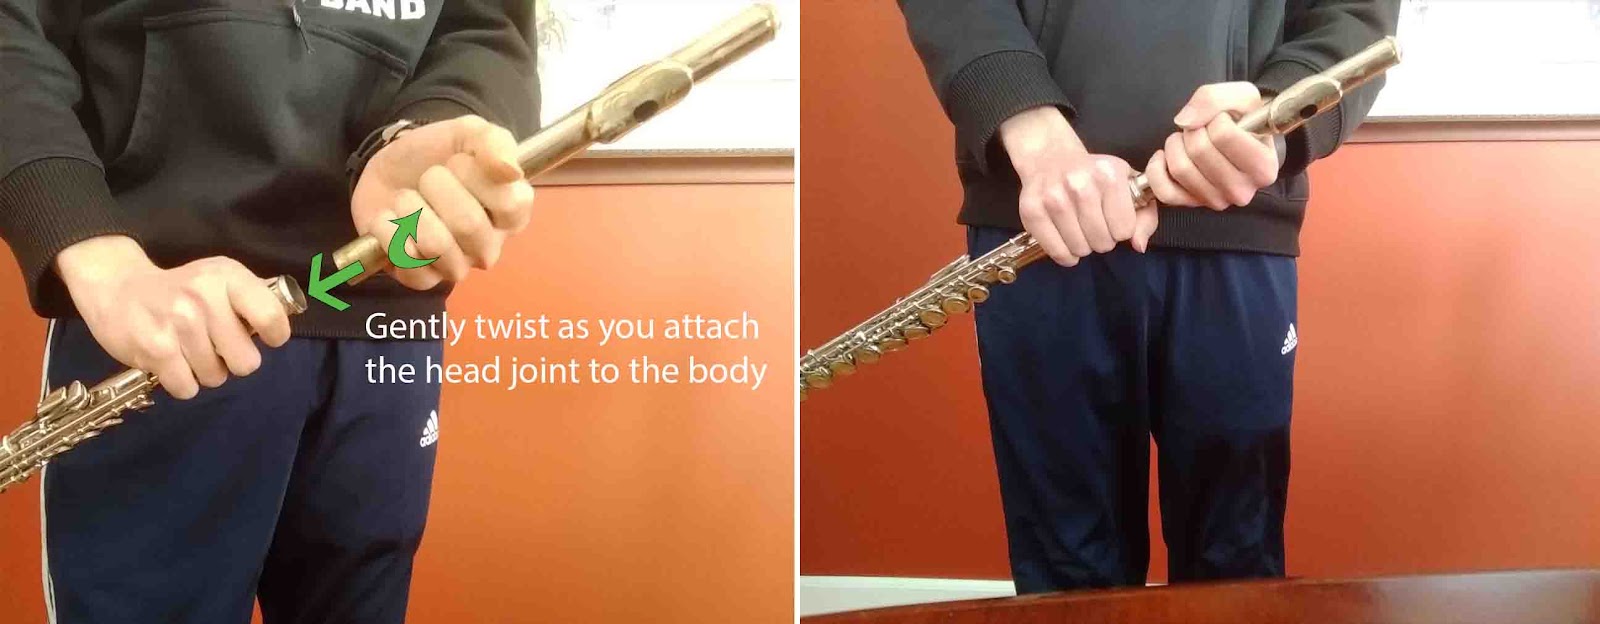
You should insert the head joint into the barrel – the section of the body that doesn’t have any keys or rods. You can do this with a twisting motion, so as to minimize the amount of friction between the two pieces of moving metal. You don’t have to push it in all the way – leave about a quarter of an inch. This is for tuning purposes.
It is also important to ensure that you align the headjoint and the body properly. The hole on the head joint, called the embouchure hole, should be aligned with the keys on the body. You can check this by looking down the flute vertically, as shown below. The black line represents the alignment you should be looking for:

Step 3: attaching the foot joint to the body
At this point, you should remove the foot joint from your case. You’ll attach it to the other side of the flute, and use the same twisting motion to get it into place with the least amount of resistance.
Again, there is a specific way that you should hold the foot joint of the flute. You don’t want to put pressure on any of the keys or rods. At the end of the foot joint, there should be a section that doesn’t have any keys or rods, and this is the part by which you should hold the foot joint.

The part of the foot joint that you should put into the body is the part that is near a cluster of keys. Likewise, you should attach the foot joint to the end of the body that has many keys – the other side is where you should have attached the head joint to.
As was the case for the head joint, it is important to make sure that the foot joint is properly aligned with the body. If it is properly aligned, the rod of the foot joint should be in line with the center of the keys on the body.
This may seem counterintuitive. Many beginners initially think that the rod of the foot joint should be aligned with the rods of the body, but this is not the case. When the rod of the foot joint is aligned with the rods of the body, the keys on the foot joint become easily accessible to the right hand. Having all the rods be aligned would make reaching the foot joint keys much more difficult.

Taking it apart and swabbing it
If you played on your flute at all, you always want to make sure that you swab it out before putting it back in its case. Detach each piece by using the same twisting motion that you used to put it together – keeping in mind not to hold it by the keys or rods.
Most flutes come with a cleaning cloth and a cleaning rod. The rod should have a small slot on it which you can fit the cloth through.
Once the cloth is attached, you can run your swab through the head joint and foot joint one time each, and this should be sufficient. The body of the flute is larger than most swabs, so you will have to swab it out twice, once on each end. Don’t try to push the swab all the way through the flute; this will just get it stuck.
You can see below how you should go about the process of swabbing.

Conclusion
Putting your flute together is a process which will become easier as you grow accustomed to your instrument. The most important elements are knowing how to align it properly (with the embouchure hole in line with the keys of the body, and the keys of the body in line with the rod of the foot joint), knowing how to avoid damaging the instrument as you put it together (by using a gentle twisting motion), and knowing how to open your case properly without the risk of the flute falling out.
After learning how to put it together, the next step is probably learning how to hold it properly. You can find a guide on the subject here.