
How to Put a Saxophone Together
Putting together a saxophone is a simple process which is second nature to any saxophonist who has been playing for a reasonable length of time. To a beginner, however, it may seem confusing and non-obvious. This article is intended to be a thorough guide to this process, and will cover all the possible mistakes and pitfalls that you could make along the way.
The steps to putting a saxophone together are:
- Open your case
- Put the neck strap on
- Attach the mouthpiece to the neck
- Place the ligature on the mouthpiece
- Wet the reed
- Place the reed on the mouthpiece
- Tighten the ligature
- Attach the neck to the body of the saxophone
- Connect the neck strap to the saxophone
This may seem complicated, and you may not yet be sure what the “ligature” is, or what the “neck” is. No worries; I’ll go through it step-by-step and explain everything that you need to know. If you aren’t entirely sure what you’re doing, then make sure you read through the article before attempting to put your saxophone together. There are a few mistakes that can be made along the way which you are best off avoiding, and my job is to help you avoid them.
Step one: Opening your case
Opening the case may seem like an incredibly simple step, but there are a few ways that you can go wrong with it.
First, the case needs to be on a stable, unmoving, flat surface. The best place to open up your case is on the ground. A chair (without wheels) can also work, if it is sufficiently large. Avoid putting the case on your lap if possible. This can work if you are extremely careful, but I have heard (and witnessed) horror stories of cases slipping off someone’s lap and the saxophone falling on the ground. Once the saxophone is dented, there is no repair that can return it to peak condition (though the saxophone will likely still be playable).

Second, make sure that you open the case such that the keys face up. If you don’t, then the saxophone will fall as soon as you open it, and it could get damaged. In most cases, you should be lifting the latches up when you open the case, as this should imply that the keys are facing upward.

Step two: Put the neck strap on
This step is fairly straightforward. If you have a neck strap or harness, then it should always be the first thing you put on and the last thing that you take off after you are finished playing.
If you don’t have a neck strap or harness
Never attempt to play your instrument without one of these two. The neck strap that I typically recommend is this one, and the harness that I typically recommend is this one.
Neck straps have been used for as long as the saxophone has existed, but harnesses have become more common recently because they take the weight of the instrument off of the neck and put it onto the shoulders, which are better able to handle it.
Regardless of which you choose or whether you follow my recommendations, it is most important to have a neck strap or harness which:
- Has a closed hook (so that the saxophone cannot fall off of it)
- Is easily adjustable, and
- Does not strain your neck. Harnesses meet this criteria by default; neck straps may need to be of the softer variety to avoid being uncomfortable on the neck. If the neck strap isn’t soft, you can wear a collared shirt while playing and allow the neck strap to rest on the collar.
Step three: Put the mouthpiece on the neck
Inside your case, you should find a curved tube of metal which is much smaller than the body of the saxophone itself. This is called the neck. All saxophones should come with a neck, though on some soprano saxophones the neck may be irremovable.
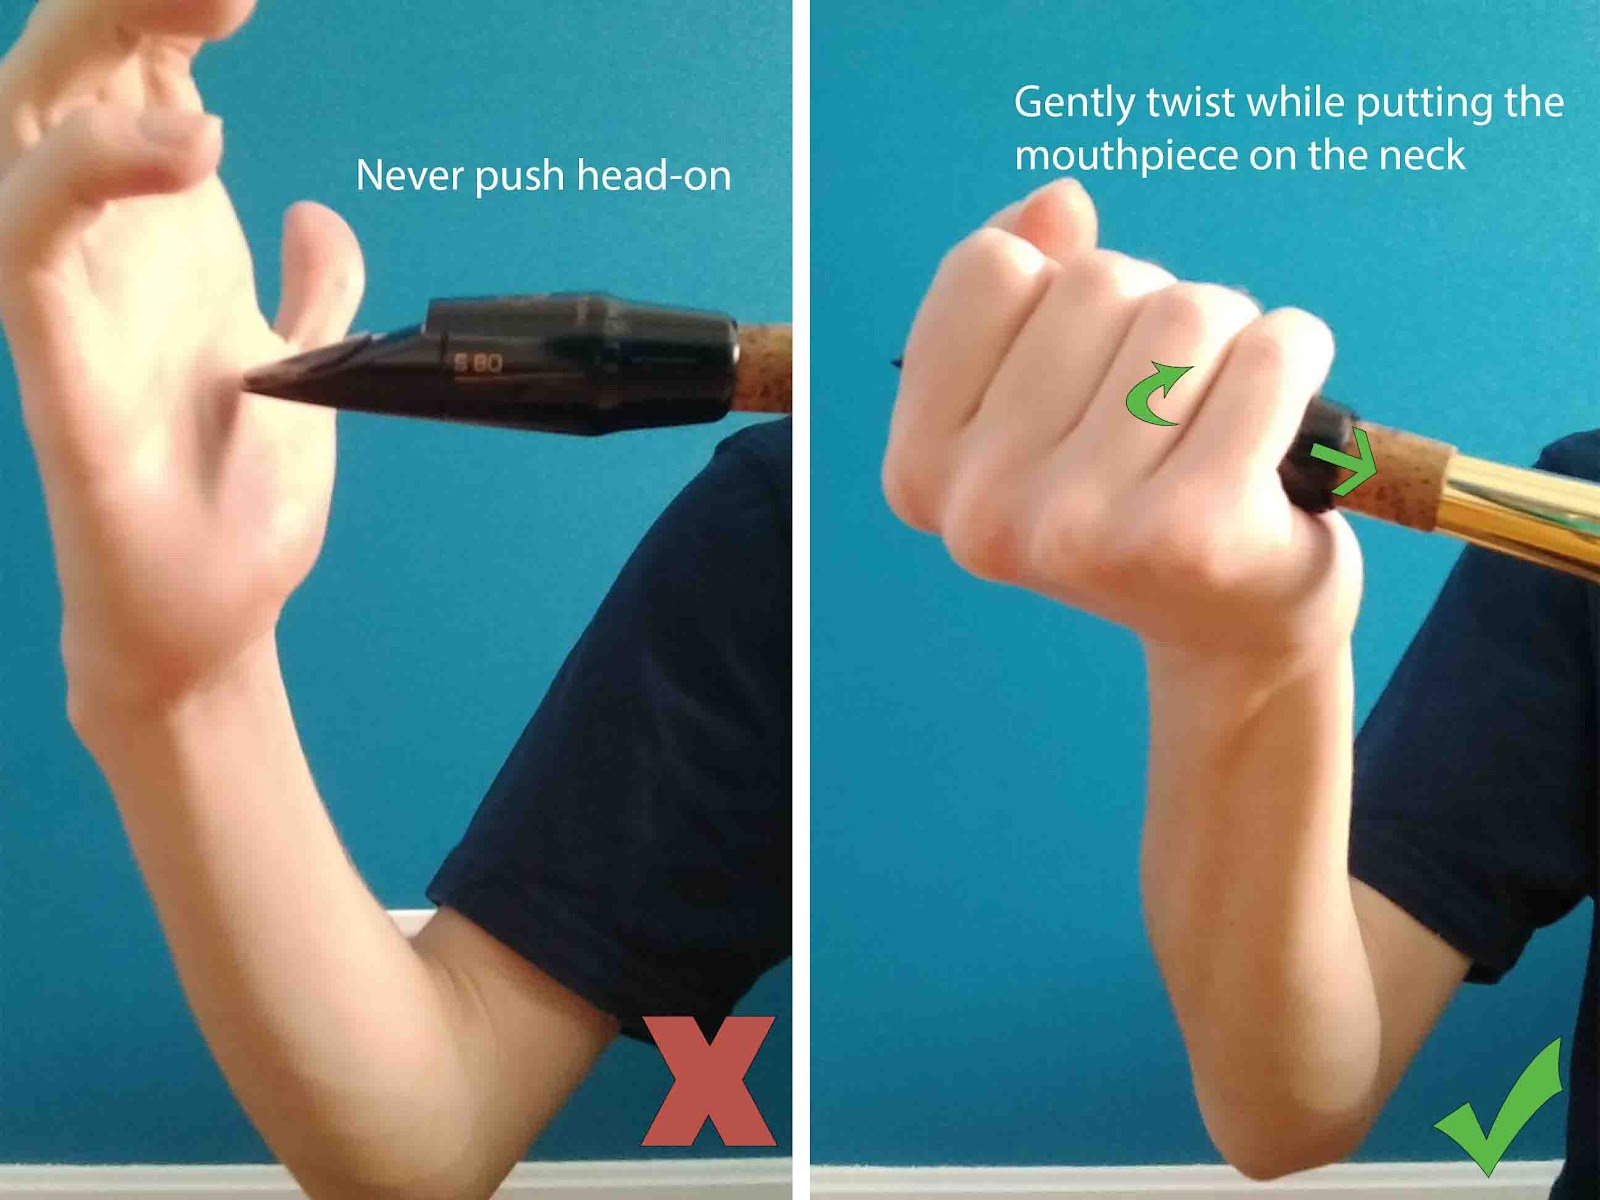
On one end of the neck you will find a cork. This is where the mouthpiece should go. Most saxophones will come with a mouthpiece, albeit a low-quality one. If you have a mouthpiece, hold it by the sides and use a twisting motion to get it onto the cork. Never push the mouthpiece onto the cork head-on; this will permanently destroy the mouthpiece.
For now, try to put the mouthpiece about halfway onto the cork. You may find a fair amount of resistance as you put it on, and if so then it is worth knowing how to fix this problem.
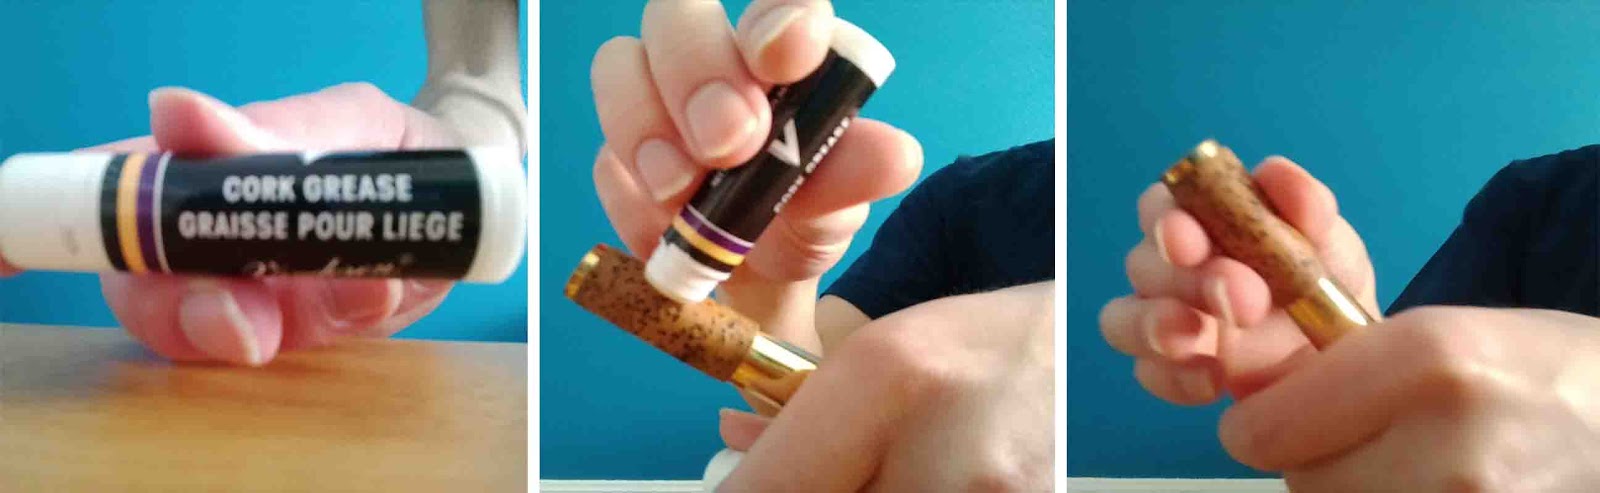
You may find that your saxophone came with a small tube of what looks like lip balm. It is not lip balm and you should not use it on your lips. It is actually cork grease, and it is meant to go on your cork so that the mouthpiece fits better. Simply put some of the cork grease onto the cork, and then use your fingers to rub it in. Then try putting your mouthpiece on again, and see if it is easier. If it is not easier, you may need to use some more cork grease.
If you don’t have any cork grease, you can find some here. It is generally a useful thing for saxophonists to have.
If you don’t have a mouthpiece
If your saxophone did not come with a mouthpiece for any reason, then I have a recommendation for what you can use depending on the type of saxophone that you play. All of these are high-quality mouthpieces, because I find that learning on cheap ones only results in bad habits. I think that these are highly suitable for beginners and won’t encourage bad habits. Also, note that these tend to be classical (as opposed to jazz) mouthpieces; it is generally easier to learn the basics of classical saxophone.
Soprano saxophone: Vandoren Optimum SL3
Alto saxophone: Vandoren Optimum AL3
Tenor saxophone: Vandoren T20
Bari saxophone: Vandoren Optimum BL3
Make sure that you pick the mouthpiece which corresponds to the type of saxophone that you play; it won’t be compatible otherwise.
Step 4: Put the ligature on the mouthpiece
This is another fairly simple step, but it is possible to put the ligature on the wrong way. Almost regardless of the ligature that you are using, the screws should always go to the right side.
Don’t tighten the ligature just yet, as you still need to put the reed onto the saxophone. It is generally standard to put the ligature on before the reed, as switching the two steps can open the possibility of accidentally chipping the reed.
If you don’t have a ligature
The quality of the ligature isn’t as important as the quality of the mouthpiece. You can find relatively cheap metal ligatures which get the job done here (I’m including the link for an alto saxophone ligature – if you play a different type of saxophone, make sure that you pick the right ligature for you!).
If you are looking for something of higher quality, I think that Rovner ligatures make for a good starting point, and you can find them here.
Step 5: Wet the reed
This step has a little bit more nuance to it, and it isn’t as simple as putting your reed into a glass of water.
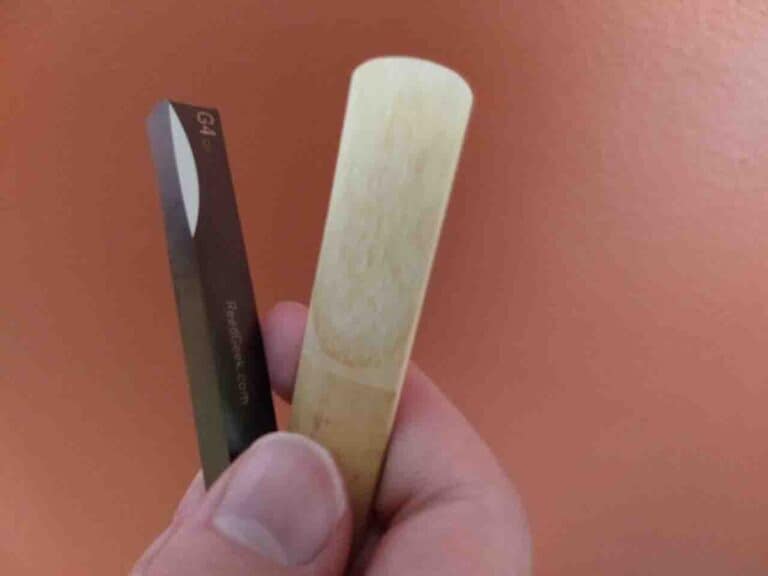
First, you only need to wet cane reeds. If you are using a plastic reed, you can actually skip this step entirely. This makes plastic reeds easy to learn on, and you can buy one that I recommend here if you are interested (a single plastic reed should last you about a year). Again, the link leads to an alto saxophone reed, so make sure that you find the equivalent product for the saxophone that you play.
Assuming that you are indeed using a cane reed, though, I recommend wetting it with saliva, not water. The reason for this is because reeds need to be flexible, and the acidic enzymes in saliva help soften them up a little bit.
You have to be careful with how you wet them, however. I recommend putting the back end of the reed into your mouth first. The tip of the reed is more delicate, and soaking the back of it first will be less prone to cause damage. You can keep the back of the reed in your mouth for about 30 seconds to a minute, which should be sufficient.
After soaking the back of the reed, soak the front half of it for just a second or two. Again, the tip is fragile, so be sure to be gentle on it. If you soak it too much, it could become warped or waterlogged. Just licking it once or twice (on the top and bottom) should do the trick.

Step 6: Place the reed on the mouthpiece
After you are finished soaking the reed (assuming that it is cane, otherwise there would be no need to soak it) you are ready to place it on the mouthpiece. This is possibly the most difficult step, as you’ll need to make sure that the edges of the reed are aligned with the edges of the flat portion of the mouthpiece.
Start by making sure that the ligature is relatively loose. Then, try to slip the back end of the reed onto the flat surface of the mouthpiece such that it ends up between the mouthpiece and the ligature. You may need to move the ligature temporarily in order to get the reed in place. You can see this shown below.

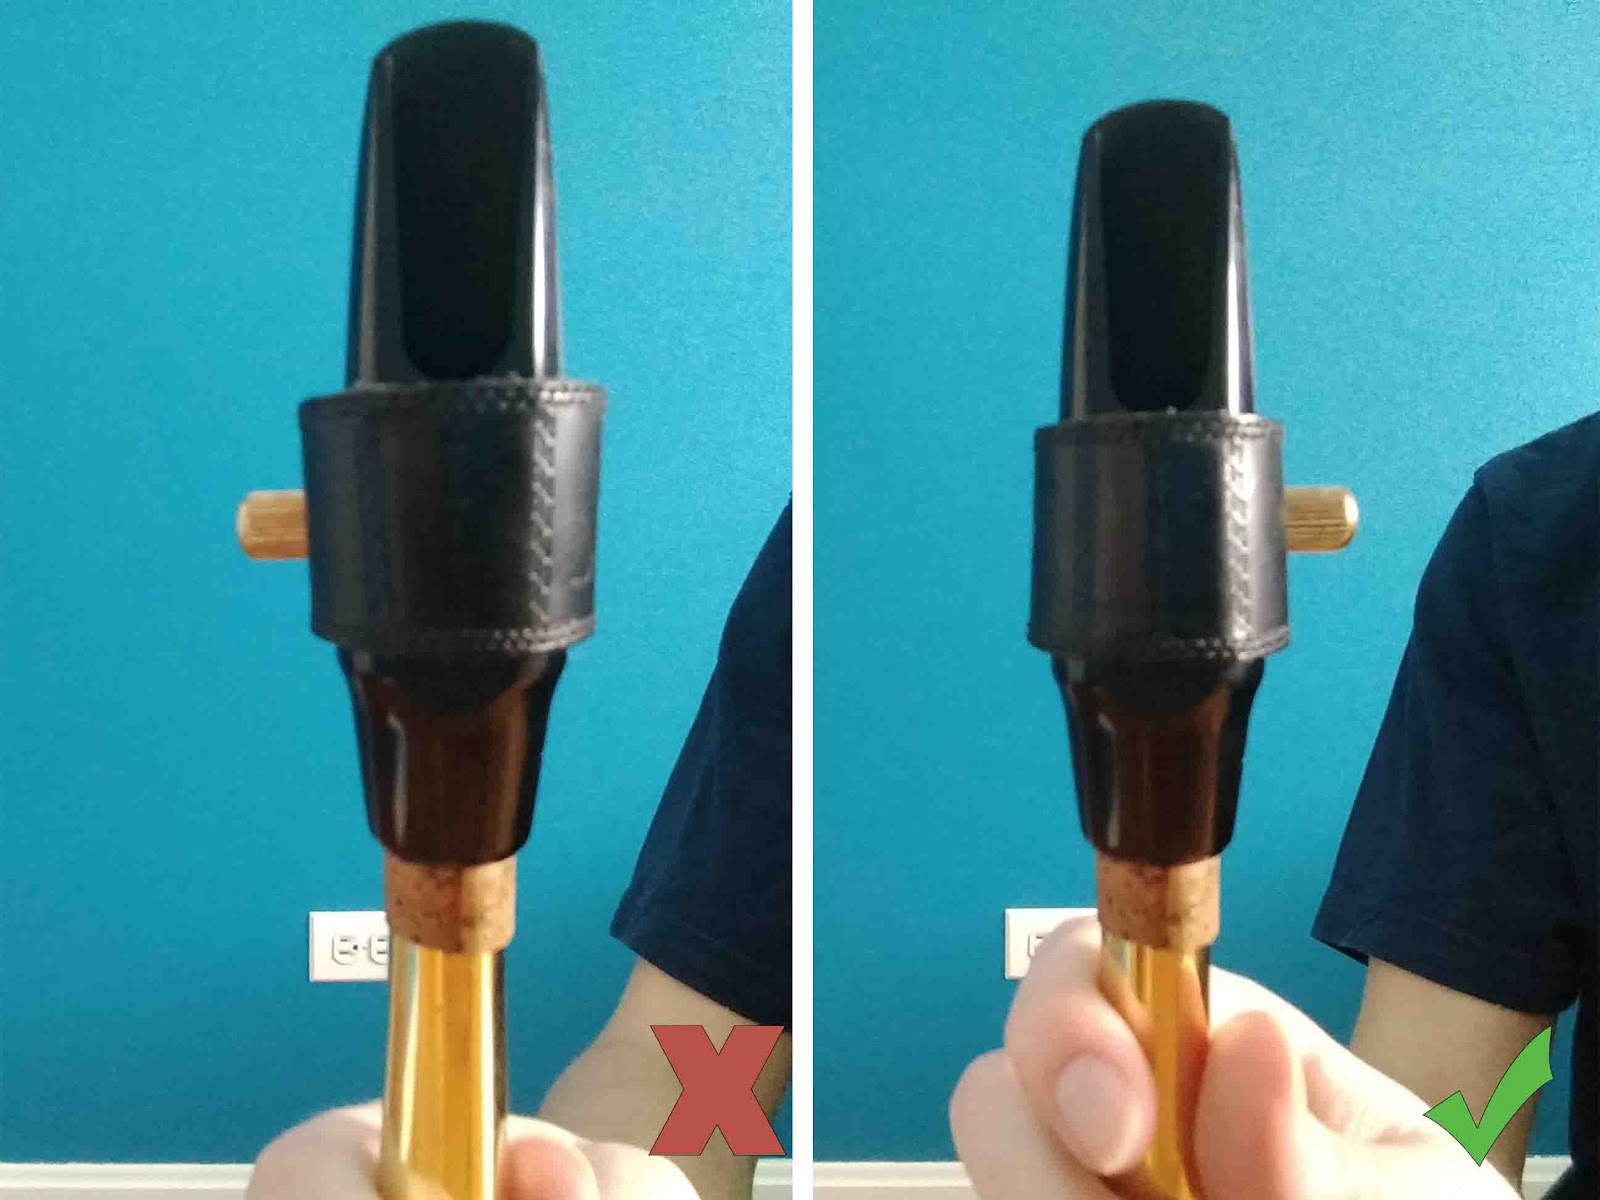
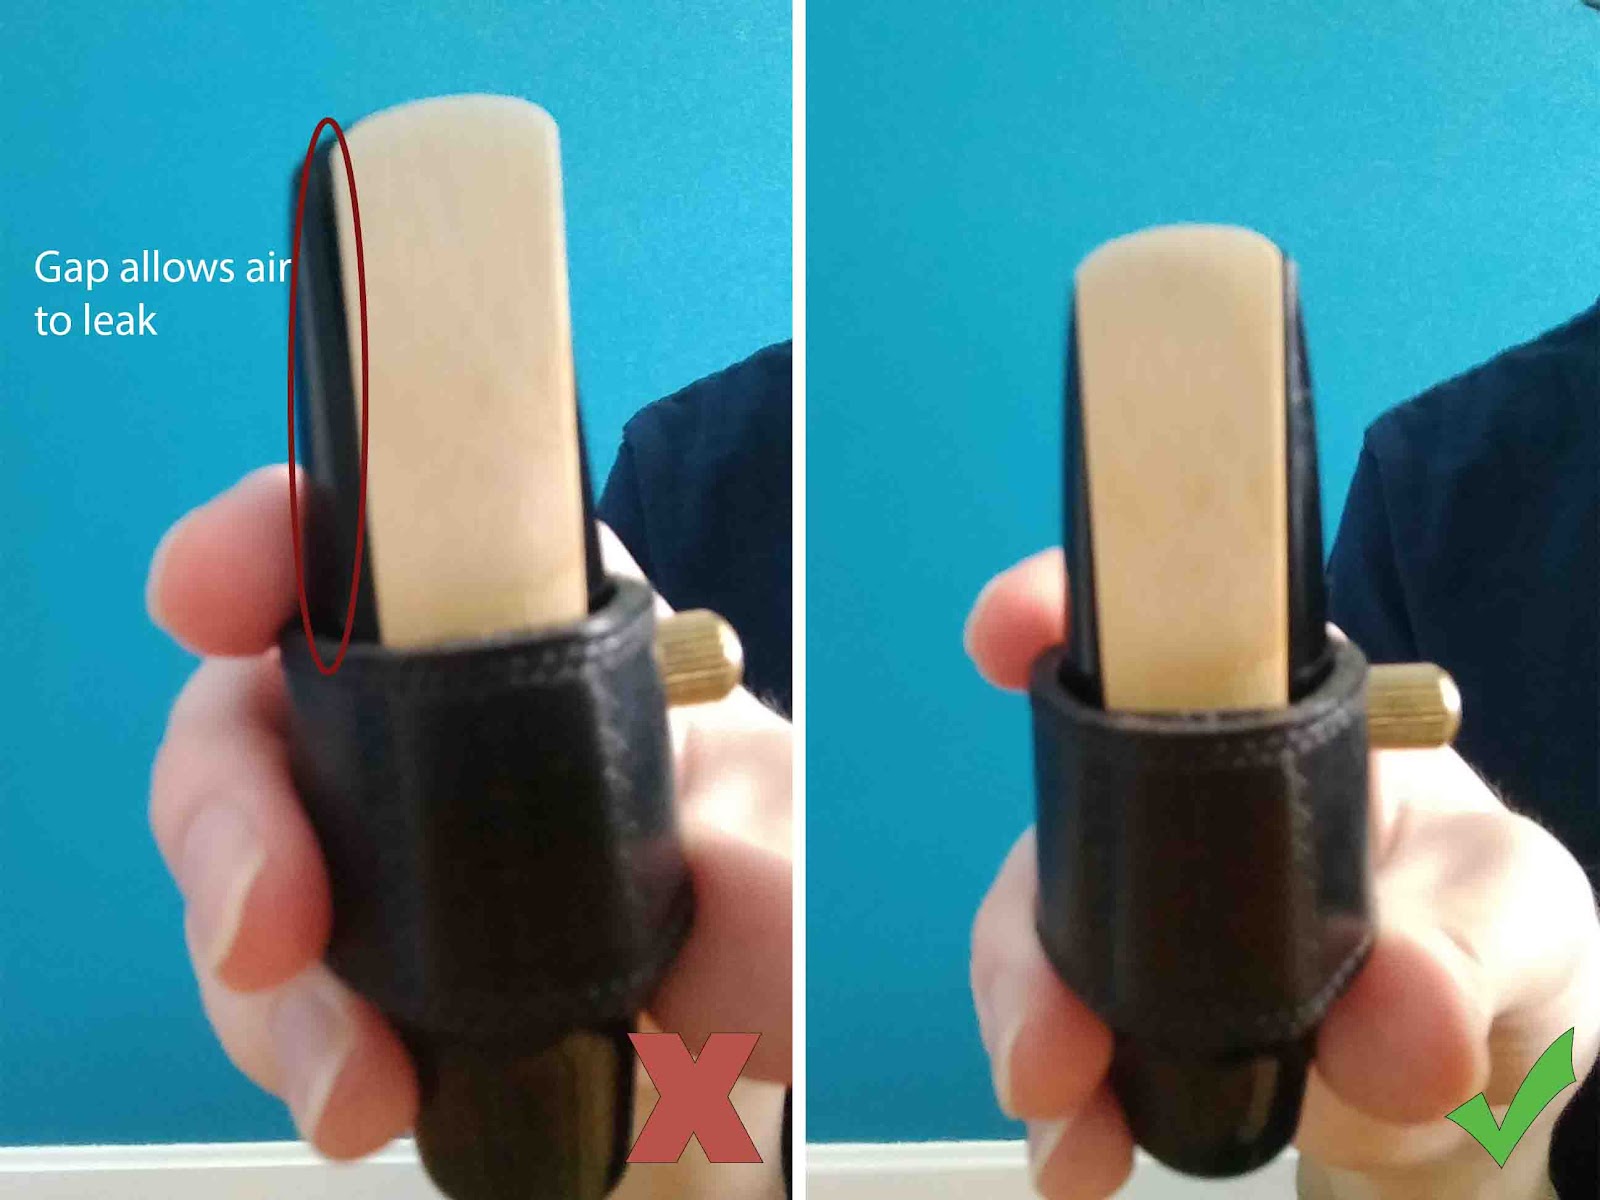
Once you get the reed onto the flat area of the mouthpiece, try to align the edges of the reed (the two sides and the tip) with the edges of the flat surface. You’ll want to make sure that there aren’t any gaps between the sides of the mouthpiece and the reed (though there will always be a gap between the tip of the mouthpiece and the tip of the reed; this is what you blow into). You can see below a correct and incorrect positioning of the reed.
Step 7: Tighten the ligature
At this point, you should tighten the screws of the ligature so that the reed is held in place. However, it is also important that you do not tighten the ligature too much. In fact, the ligature should be as loose as possible while still keeping the reed aligned with the mouthpiece properly.
The reason that the ligature should ultimately be kept relatively loose is because the reed needs to be allowed to vibrate as much as possible to produce a good sound. By keeping the ligature loose, the reed is allowed to vibrate in a way which creates a much richer sound.
Once you begin playing your instrument, it may be worthwhile to experiment with tightening and loosening the ligature to see how it affects your sound.
Step 8: Attach the neck to the body of the saxophone
The next step is to insert the bottom part of the saxophone neck into the top of the body of the saxophone. It is a relatively simple step, but a few things can go wrong at this point.
Before doing this, though, you should first remove the cap at the top of the body of the saxophone if it has one. The cap is simply for when the saxophone is not in use, and you can put it back in as you are putting the saxophone back in its case.
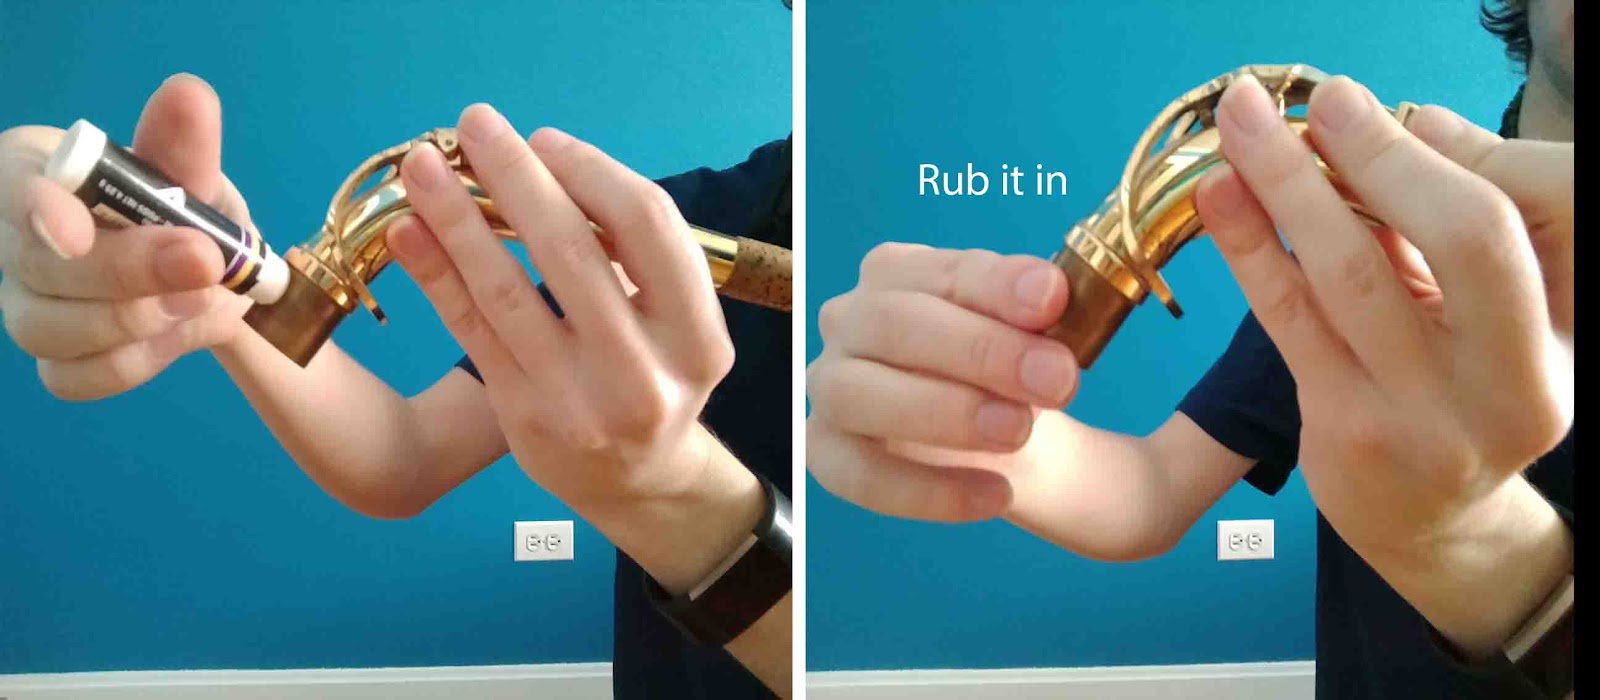
Then, you will actually want to put some cork grease onto the section of the neck that fits into the body of the saxophone. The reason for this is that the neck needs to fit smoothly into the saxophone, and it can become damaged if it does not. You shouldn’t need to put cork grease on every time (or even most times), but you should put some on once every few weeks or every time that you notice resistance.
Once you’ve made sure that the bottom portion of the neck is sufficiently greased, you should make sure that the opening on the body of the saxophone is loose enough for you to fit the neck in. You won’t need to adjust this screw often, but try to make sure it isn’t a tight fit. You can always tighten it again once you’ve put the neck in.
At this point, you can put the neck into the top of the saxophone. When doing this, you should press the neck straight downward into the opening (avoid doing it at an angle). You can use a twisting motion to help it along; just aim for the minimum amount of resistance as you put it in.
You can see how this is done below:

Step 9: Connect the neck strap to the saxophone
On the back side of your saxophone you’ll find a small ring. Simply hook the neck strap onto the ring, and you should then be able to have the saxophone securely hang from your body. Check to make sure that the saxophone is not falling off of your body, and that the neck is not slipping out of the instrument, and you should be set.
The only precaution you really need to take during this step is to not drop your saxophone. This may sound obvious, but as this step may involve lifting the saxophone to your neck strap, it needs to be mentioned.

Conclusion
I know that there’s a lot of points and nuances I’ve made above, so don’t feel too worried if you don’t absorb it all at once. This article will still be here the next time that you feel compelled to put your instrument together and possibly practice. After going through this process a few times, it will become like second nature.
Knowing how to put a saxophone together, of course, does not guarantee that you are able to play it or even hold it properly. If you are looking for the next step, I recommend looking at our guide on how to hold the saxophone. There is some overlap, but I think if you are a beginner it will help push you in the right direction.